Sharing Files between Windows 7, Windows Vista and Windows XP
Microsoft released multiple Windows systems, so you might have different Windows systems on your home computers. The popular Windows system are Windows 7, Windows Vista and Windows XP. A Frequently asked question is how to share files among these different windows systems.
Actually, to get sharing files among multiple windows system successfully, it really depends on your real environment, such as firewalls, security settings. However, we still need to know the common steps which we should do for the sharing.
1: We’d better use the same workgroup name for all computers:
If there is at least one Windows XP in your computers, you should change all workgroup name to the same. for Windows 7 and Vista, you do not need to do this, but just in case of you have Windows XP, you have to make sure you have the same workgroup name. (If you just want to read or write files on Windows XP from Windows 7 machine, you do not need to set the same workgroup name, but if you want to read or write files on Windows 7 from Windows XP machine, you have to use the same workgroup name. )
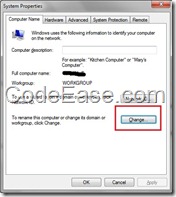
Windows 7: Start –> Computer, right click it –> click properties –> change settings –> Change button
Windows Vista: Similar with above
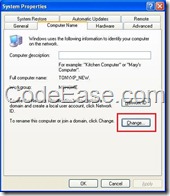
Windows XP: Start -> My Computer, right click it –> Propertiese –> Computer Name tag –> Change button
2: Windows 7 - Set Home network:
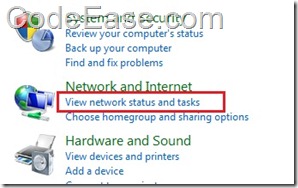
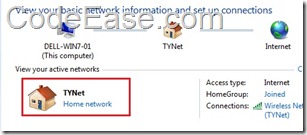
Go to Control Panel, select "View network status and tasks" under "Network and Internet"
Make sure your active networks is Home network, if it is not, click the link to change the network to home network.
(Note: Please DO NOT set your network to home network or work network in a public place, otherwise other people might access to your computer. you should set your network to "Public network" if you are in public place.)
3: Windows Vista – Set Private network and Turn on File sharing and Folder sharing:
The first thing is setting your Vista network to Private network:
Go to Control Panel, Click "Network and Internet", select "Network and Sharing Center", then click "Customize", click "Private". Click Next and Close.
(Note: Same as Windows 7, please ONLY set your network to be Private when you are NOT in public places.)
The second is that turn on file and folder sharing:
Open "Network and Sharing Center" through control panel. Under "Sharing and Discovery", click to expand the file section, Click "Turn on file sharing", and then click "Apply" (You might need an Administrator password here).
Continue to turn on folder sharing: Click to expand the "Public folder sharing", you can see there are 2 options which you can select: "Turn on sharing so anyone with network access can open files" and "Turn on sharing so anyone with network access can open, change, and create files", choose one of them and and then click Apply.
4: Windows XP – Turn on File and Printer Sharing:
In most of cases, The Windows XP system on your computer should have already turned on the File and Printer Sharing for Windows Network. Go to your Local Area Network Properties and you might see it.
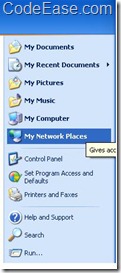
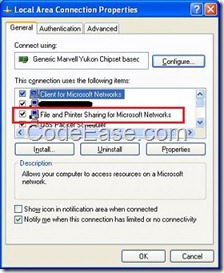
You might still need to do this step for your Windows XP, no matter your Windows XP could even share files with other Windows XP Machines before. Unless you have already been able to access other PC’s folder.
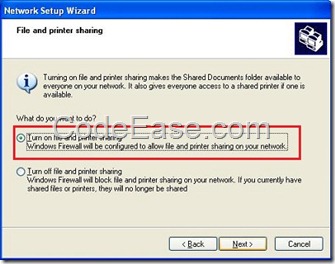
Go to control panel and select "Network Setup Wizard", click it and following the steps:
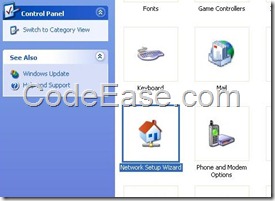
make sure you select "Turn on file and printer sharing", then continue the left steps to install File and Printer Sharing service.
5: Use password-protected sharing:
This step is optional. You do not need to do it, it is only for Windows 7 and Vista. If your network is just in home, or you make sure your network is safe enough. you can skip this step.
6: Specify folder which you want to share:
Now you need to specify a folder to share with other computers.
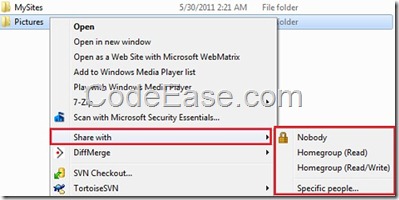
On Windows 7 and Windows Vista, right click the folder and select "Share with…", but on Windows XP, when right click the foler, you select "Sharing and Security"
The following is the screen for Windows 7, you can select share with "Homegroup (Read)", so other computer can read the files from this folder on Windows 7 PC.
7: Set your firewall so that it allows file and printer sharing
You have to check your firewall settings to allow file and printer sharing. it depends on your firewall software. We can not give detail information for this step because different people are using different firewalls.
8: Access the sharing folders:
After you finished all above steps, you will find it is easy to get sharing works when you access the sharing folder which is on Windows XP from Windows 7 or Windows Vista:
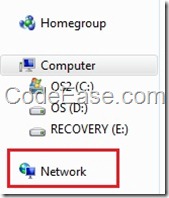
Start button –> Computer –> select "Network" on the bottom-left side. then you will see all the computers which are in the same work group, and you can double click them to access their shared folders.
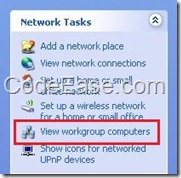
For Windows XP, It is some harder to access Windows 7 or Windows Vista machine. Go to My Computer and check the left panel, click "view workgroup computers", you should be able to see all computers on the same workgroup too. double click the PC icon which you want to access, sometimes you have to input user name and password to access shared folder on other machine.
