First Windows Phone 7 Application
We have introduced the prepare process which we develop Windows Phone 7 Application "Install Windows Phone 7 Developer Tools for Visual Studio 2010". Today we start to write the first Windows Phone 7 Application.
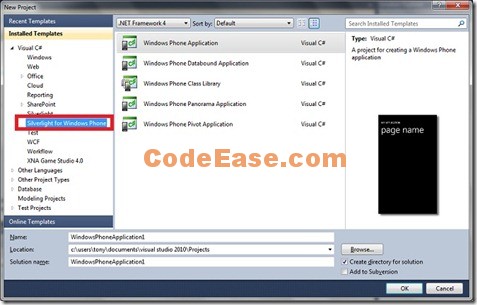
Open Visual Studio 2010 (We are using VS 2010 Ultimate version so all interface which you will see might be some different if you are using Visual Studio 2010 Express) and create a new project:
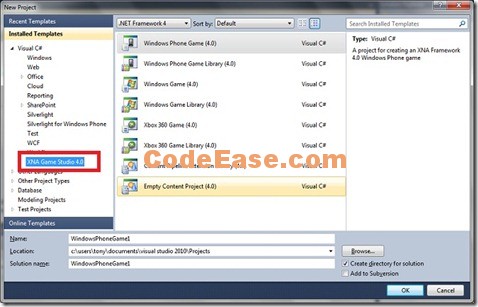
There are two kinds of templates for Windows Phone 7 Apps:
1: Silverlight for Windows Phone;
2: XNA Game Studio 4.0;
The Silverlight template can build most of Windows Phone 7 project; The XNA Game Studio template focus on Windows Phone XNA game and general XNA games;
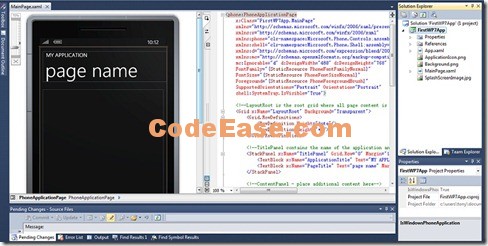
In our first WP7 application, we choose "Silverlight for Windows Phone" template and its "Windows Phone Application"; We gave the file name FirstWP7App. After you click OK you can see below screen:
Here you can see the Windows Phone emulator ! Great !
We don’t want to introduce how to use the emulator or how to write the Windows Phone 7 App here, you can find lots of tutorial in the internet. In this article we just want post our Windows Phone code and some operations in Visual Studio 2010, and also we use the same rule in our subsequent Windows Phone 7 Application articles.
It is very similar with you write a normal Silverlight Application.
1: In the middle column which you can see it is Silverlight source code, Find the code block as the following:
        <!--TitlePanel contains the name of the application and page title-->
        <StackPanel x:Name="TitlePanel" Grid.Row="0" Margin="12,17,0,28">
            <TextBlock x:Name="ApplicationTitle" Text="MY APPLICATION" Style="{StaticResource PhoneTextNormalStyle}"/>
            <TextBlock x:Name="PageTitle" Text="page name" Margin="9,-7,0,0" Style="{StaticResource PhoneTextTitle1Style}"/>
        </StackPanel>
Now we first change "page name" to "My Page 1",
        <!--TitlePanel contains the name of the application and page title-->
        <StackPanel x:Name="TitlePanel" Grid.Row="0" Margin="12,17,0,28">
            <TextBlock x:Name="ApplicationTitle" Text="MY APPLICATION" Style="{StaticResource PhoneTextNormalStyle}"/>
            <TextBlock x:Name="PageTitle" Text="My Page 1" Margin="9,-7,0,0" Style="{StaticResource PhoneTextTitle1Style}"/>
        </StackPanel>
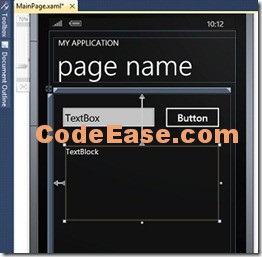
        <!--ContentPanel - place additional content here-->
        <Grid x:Name="ContentPanel" Grid.Row="1" Margin="12,0,12,0">
            <Button Content="Button" Height="73" HorizontalAlignment="Left" Margin="277,25,0,0" Name="button1" VerticalAlignment="Top" Width="160" />
            <TextBox Height="72" HorizontalAlignment="Left" Margin="12,25,0,0" Name="textBox1" Text="TextBox" VerticalAlignment="Top" Width="259" />
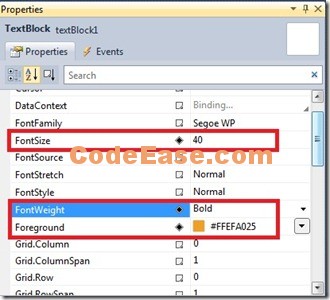
            <TextBlock Height="190" HorizontalAlignment="Left" Margin="31,135,0,0" Name="textBlock1" Text="TextBlock" VerticalAlignment="Top" Width="394" FontSize="40" Foreground="#FFEFA025" FontWeight="Bold" />
        </Grid>
        private void button1_Click(object sender, RoutedEventArgs e)
        {
            this.textBlock1.Text = "Hello ! " + this.textBox1.Text;
        }
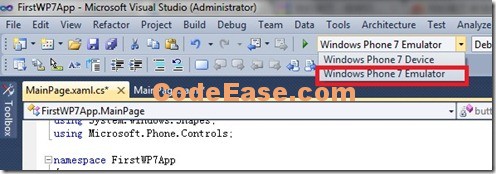
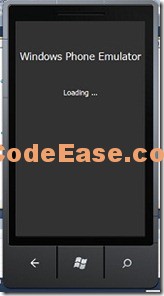
6: The emulator will load some while if it is the first time loading:
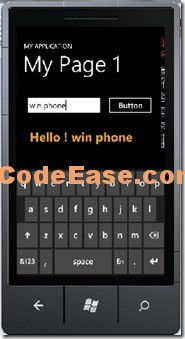
7: The following is the result. Note you have to use the keyboard in emulator to input your text:
This is our first Windows Phone 7, very simple, some content maybe the same as other places because it is too simple to let it unique. But please know this is really ours own sample code.
